/** Google Analytics script below */ /** end Google Analytics script */

Saturday, May 29, 2010

May SBQ: Process vs. Project

I’ve been way behind on my blog reading, so I’ve just discovered that Lee (The Lake Stitcher) has decided to adopt and restart the Stitching Bloggers’ Question series. This series died out a couple of years ago, and I’m looking forward to a new set of questions, and perhaps readdressing some I answered earlier.

Anyway, on to May’s question:

Suppose we say that there are two types of stitchers.  

There are those who enjoy the “process” of stitching.  They stitch for stitching’s sake and if something gets finished, so much the better, but it’s not necessarily the end goal.   Primarily, it’s the application of needle and thread to cloth that makes them happiest.

Then there are those who are “project” stitchers.  They move steadily through their projects, certainly enjoying their stitching time, but finding their greatest joy in the completed stitching. 

If you had to pick one to describe yourself, which type of stitcher would you be?  I imagine that we could all say that we fall somewhere in between, but really think hard about this and try to pick just one.  And once you’ve decided whether you’re a Process or Project stitcher, tell us if you recognize that approach in other parts of your life.

While I definitely enjoy finishing projects and showing them off to friends and family, I’m a process stitcher all the way. I think that shows in my blog posts.

I enjoy the process—bringing a plain piece of fabric or canvas to life with detailed stitches, learning new techniques and figuring out different ways to use them, and sharing what I learn here.

Do I recognize this in other areas of my life? I’ve never really thought about it before. I guess my engineering career applies. The projects I work on usually last for a year or more, and even once they’re “launched,” there’s still some ongoing work to address problems in the finished product. This might frustrate some people, not seeing the concrete result of your efforts for so long, but I really do enjoy the process.

--------------------------

This question has reminded me of all of the projects I have completed since I started stitching 19 years ago. Many of these are not even framed or otherwise in a finished format, but I enjoyed them while they were in progress. I’m thinking of starting up a regular series of “Friday Finishes” where I post each week (providing life doesn’t get in the way) about one of my completed pieces. Some may be recent projects, and others may be from many years ago.

What do you think? Is there any interest in such a series? Does anybody else want to post their finishes similarly? Please let me know!

Sunday, May 23, 2010

Rediscovering the joy of Hardanger, and a public service message

Thanks for all of the votes on projects from my last post. I decided to pick up my original Hardanger design.

I have always subscribed to the Janice Love method of stitching Hardanger "in hand" rather than on a frame. Due to my carpal tunnel syndrome, I can't tell you the last time I was able to spend more than about 15 minutes in any given week working in hand.

Thank goodness for modern medicine!

For the first time in years, I have been able to comfortably stitch away on my Hardanger. I had forgotten how enjoyable it could be. I've gotten a bit out of practice, so my tension isn't as good as it once was, but it's so amazing to be able to do needleweaving without waiting for the onset of pain.

I haven't made a great deal of progress, so no picture today, but I just wanted to pass the message on.

If you're experiencing the pain and/or numbness of carpal tunnel syndrome and have tried non-surgical treatment without improvement and if these symptoms are keeping you from enjoying your stitching, please do consider surgery.

I put it off for much, much too long. Fortunately I didn't end up with any permanent nerve damage, but I did need to set aside many enjoyable techniques, including Hardanger, off-loom beading, and shuttle tatting.

Take care of yourselves, everybody, so you can enjoy your stitching (and the rest of your life!) to the fullest!

Tuesday, May 18, 2010

Unending background on Plum Blossoms

Unfortunately, stitching away on never-ending background doesn't make for decent blog content. Fortunately, I am making progress on Plum Blossoms.

(Oh, and thanks go to Susan for the hint on making my Japanese needle cease squeaking. I didn't have any fine sandpaper, but an emery board worked in a pinch. I made sure the needle kept spinning so it didn't get any flat edges. Thanks, Susan!)

In the past week, PB has gone from this:


To this:

While I'm very glad to be making progress on this, I need to break up the monotony a bit. I may pull out one of my other 4 goal pieces to get a little bit of variety in. Anybody want to vote for which one?

Wednesday, May 12, 2010

Since you asked: Hannah Thornbush update

In yesterday's post, I mentioned that I had been doing a bit of stitching on the Hannah Thornbush sampler from The Essamplaire. A couple of you asked about my progress.

I haven't made a whole lot of headway here. I did manage to finish band 3, and made a bit of a start on band 4.

Almost all of the stitching on these two bands thus far is a version of marking cross. This version of marking cross results in

X|X|X|X|X

on the front of the stitching (that is, crosses with vertical stitches between them). This can also be done in vertical rows with horizontal stitches between each cross, and my piece has both, depending on which is easier to stitch at any given portion fo the design.

The reverse (back) side of this version of marking cross looks like regular cross stitch.

Thanks for asking about Hannah's progress!

Tuesday, May 11, 2010

Are there ANY finishes in sight?

Ok. I'm really frustrated with my pile of WIPs.

Over the past few weeks, I've been stumbling back and forth between Celebration Santa, Hannah Thornbush, and Potpourri.

On top of that, I've just received the instructions for the EGA correspondence course Cleopatra's Cat and the kit for the first project in Tricia Wilson Nguyen's Gold Master Class.

Aaaaacccckkkkk!

I need to get a few things finished and out of the seemingly bottomless pile of projects in progress. I'm deliberately choosing a few pieces that haven't seen the light of day in a while, in hopes that they'll each inspire me to stick with them long enough to finish them!

Here's the list:

Anyone want to join me in finishing a few projects from their own WIP piles?

Wednesday, May 5, 2010

Making Santa's Tree Look Realistic

Over a year ago, I started to stitch the tree that Santa is carrying. I found that if I stitched it in random long-and-short stitches using the thread that came in the kit (Thread Gatherer's Sheep's Silk in Forest of Greens). I quickly found that this stitch choice (as I stitched it) ended up looking like a big blob of nothing. Certainly not a tree. Unfortunately, the original photo shows a decorated tree, with too much bling to let me tell how the green was stitched.

Even worse, I found that I had a lot of the canvas peeking through from between my stitches. Since the canvas green was quite a bit different than the green of my thread, this was quite obvious.

Thankfully, Jane (hand-painted canvas guru extraordinaire) from Chilly Hollow made a great suggestion. She advised stitching the entire tree with either tent or encroaching gobelin to cover the canvas before adding the random look of the tree's needles. So I did that. Used encroaching gobelin with floss to cover the whole thing. And the tree's been in that state since January of 2009.

I wanted to wait to finish the tree until the background was complete, thinking that some of the tree's needles could overlap the background stitching a bit. As I mentioned several weeks ago, the background is finally finished. Now there's no excuse not to tackle the rest of the tree.

Back to the long and short. I tried again to use the thread in the kit. I started at the bottom of the tree. I got this far:


It just wasn't working for me. The thread was too thick, parts of it were far too blue, and it just didn't look like evergreen needles to me.

So I went back to the drawing board. What thread would look like pine needles? I didn't want to use a stranded thread like floss - a single strand would be too thin, and laying multiple strands wouldn't look like needles. Maybe a round thread? Well, something like pearl cotton would be too... um... structured. You know. Unnatural. I needed a thread without a tight obvious twist.

The winner was a thin wool thread from The Gentle Art called Simply Wool. I didn't use long and short stitches. Instead, I just kinda sketched in branches with needles using the thread.

It looks somewhat strange in the photo because the needles on the lower half of the branches are slanted in the same direction as the encroaching gobelin. This makes them less noticeable than the upper needles that are slanted opposite to the gobelin stitches. It's not quite as obvious when looking at the actual stitching, but it is there. I don't know how to fix it, but I don't think I really need to.

I may go back with a lighter green shade of wool to add some dying needles, but maybe not. The variations in the gobelin may provide enough depth.

What do you think?

Monday, May 3, 2010

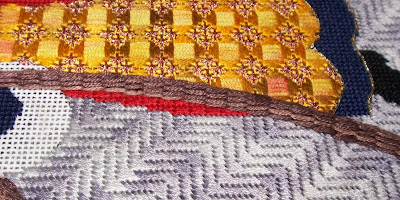
Using Casalguidi Stitch for Santa's Walking Stick

Over the past few weeks, I've made a bit more progress on Celebration Santa (canvas and stitch guide from Joan Thomasson).

When I started this project, I wasn't sure how I was going to stitch his walking stick. In Joan's original, she stitched over the brown for the stick and attached a real twig, then stitched Santa's fingers over it. This wasn't a look I was going for. Besides, it just seemed so... um... dirty to attach a twig to my canvas. Never mind I have no idea how that would hold up over time. I'm not stitching this to be an heirloom, but I would like it to last for several years, at least!

Instead, I opted to use the Casalguidi stitch, which is sometimes referred to as raised stem stitch. As the name implies, this stitch is traditionally used in Casalguidi embroidery from a little town in Italy called--you guessed it--Casalguidi! Unfortunately, I neglected to take specific step-by-step pictures, but this site shows the progression of the stitch.

For Santa's stick, I used brown DMC floss for the padding and base stitches, then switched to a variegated 6-strand floss for the stem stitches. I chose to use all six strands, not separating the threads before stitching. This is supposed to look like a stick, after all, and it shouldn't be completely smooth.

I was pleasantly surprised at the result.

This is a prime example of why I try all sorts of stitching techniques. I actually learned Casalguidi stitch in an EGA correspondence course for the traditional technique, and was thrilled to find an additional use for it!

How about you? Have you found new ways to use old techniques?