/** Google Analytics script below */ /** end Google Analytics script */

Friday, November 19, 2010

Stitch Study: Waffle Stitch (or Norwich Stitch) Tutorial

Yes, after an almost-two-year hiatus, I’m actually writing a stitch study post again. This is my first stitch study on a canvaswork stitch, the waffle stitch.

A bit about naming

Before getting into the details about the stitch, it helps to discuss the naming of this stitch. Like many stitches, this one comes up in stitch books under multiple names. In this case, it can be either the waffle stitch or the Norwich stitch.

The reverse is also true, though. The name “waffle stitch” is also another name for the broad cross stitch, and there are waffle stitches in both knitting and crochet.

Don’t be intimidated…

When first encountering the waffle stitch, it’s easy to be overwhelmed.  Depending on the type of stitch diagram and the size of the waffle stitch, the numbering on the diagram can quickly reach double digits. By breaking the stitch down and explaining the pattern, though, I’m hoping you’ll find it more approachable and perhaps even relaxing to stitch.

Let’s get started!

Step 1. Start with a simple cross stitch over multiple canvas threads. Some books will tell you that you have to have an odd number of threads, but that’s not actually true. To demonstrate, my example is over 12 threads of canvas.

The next stitch starts a repetitive pattern.  To provide a bit of contrast and because it looks more interesting, I switched to a different color.

Step 2. Come up in the hole just below the top left corner of the base cross stitch. This stitch is going to run alongside the upper-left to lower-right (\) portion of your cross stitch. Sink the needle one hole to the left of the bottom right corner.


Step 3. Your thread on the back is going to travel across the bottom of the stitch. Come up one hole to the right of the bottom left corner of the cross stitch. Now we’re going to parallel the other half of the cross stitch (/), so you’ll sink the needle below the top right corner of the cross.


Step 4. Come up one hole above the bottom right corner of the cross. (You’ll notice that your thread on the back runs down the right side of the stitch.) This stitch ends one hole to the right of the top left corner of the cross.


Step 5. Can you guess? Your thread, on the back, will go across the top of the stitch, so you can come up one thread to the left of the top right corner. And you’ll sink it one thread above the bottom left corner.

There! That’s one round, or one repeat, of the stitch.

Step 6. Repeat steps 2-5, moving one hole closer to the center of each side with each round. So the second round will start by traveling (on the back) up the left side, and coming up one thread below the previous round.

You can tell if you’re repeating the pattern correctly if all of your stitches on the back are on the edges of the square, as seen here.


With another round complete, you’ll have something that looks like this:

Keep going, repeating steps 2 through 5, changing colors as desired.

Here’s why some folks say you have to start with an odd number of threads. I’d like to add one more round of stitches, but if you look closely at the picture above, you’ll see I only have one open hole on each side. I can’t stitch another round like the previous rounds.

So I have to cheat. This round just isn’t going to have stitches on the back along the edges of the square. Oh well. Who’s going to know?

Step 7. Here’s how I like to stitch the last round on an even waffle stitch. I use double running stitch!

A. Same as step 2 above.    

B.      C.

D.

Yes, the back isn’t quite as orderly…

                                                                            …but who cares?

So what about odd waffles?

When you do have an odd number of threads in your waffle, you can just stitch the normal rounds right up to the end. Here’s the beginning of the last round of the waffle if it’s stitched over 13 threads.

A side-by-side comparison

Front:                                           Back:


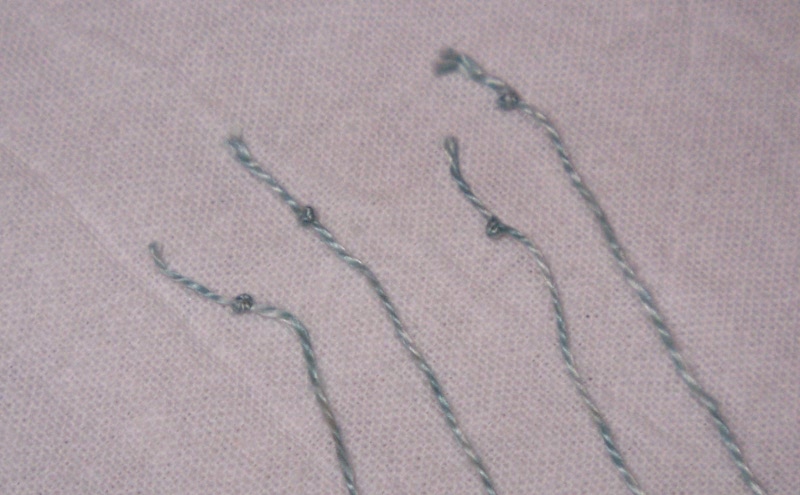
About ending threads

You may be wondering why I left all of the thread ends off to the side. In this case, it was for demonstration purposes. When I’m using waffles in a project, I’ll sometimes bury the ends in surrounding stitches. Usually, though, I’ll use L stitches to start and end threads in the middle of the waffle, since they’ll be covered over anyway.

Now it’s your turn

Are you ready to tackle waffle stitches? Try them out and let me know how it goes! What are your favorite threads to use? (By the way, ribbons, like Kreinik’s 1/16” metallic ribbon or Rainbow Gallery’s Neon Rays, work wonderfully.) What color combinations do you like? What’s the biggest waffle you’ve tried?

Please share! (And let me know if anything isn’t clear above!)

Tuesday, November 16, 2010

Mystique, Lesson 5 complete!

This project is just moving along. I don’t know why I’m always amazed at how quickly a piece can develop when I’m working on only one. You’d think I’d learn. :-)

Before digging into what was involved in lesson 5, I want to address one of the comments on the previous post. Sara Leigh asked for a close-up picture of one of the large waffles. If you can wait a few more days, Sara Leigh, I’m actually putting together a tutorial for stitching waffles.

Anyway, on to Lesson 5.

Comparing this picture to the last, you can see that I’ve filled in the blank spaces in the north and south blocks. Actually, most of the north block was completed in class, and I just had to fill in the background. Notice that while the colors are the same, the stitches are entirely different between the two blocks.

The rest of this lesson involved adding bands of a rice stitch variation and scotch stitches around the large waffles in each corner.

That’s really all this lesson included. It’s great to be filling in all of that white space!

Thursday, November 11, 2010

Mystique, Lesson 4

Yes, I’m way behind in posting about Mystique! Here’s what the project looked like after the fourth part of this fun project from Carolyn Mitchell (with a tiny part of lesson 5 started).

Throughout this lesson, I kept thinking of Shrek’s buddy, Donkey, saying, “I’m makin’ waffles!” This lesson provided lots of practice in making waffle stitches.

Three different sizes of waffle stitches were included:

  • Little waffles, four each in the corners of the north, south, east, and west blocks.
  • Medium waffles, four in the center block.
  • Big waffles, one each in the four corner blocks.

In addition, the lesson included more smyrna crosses around the largest waffles, alternating tent stitch in the background of the center square, and some double straight cross stitches in metallic, also in the center square.

Stay tuned. I’ll have an update about lesson 5 in the next few days!

Tuesday, October 26, 2010

Mystique, Lesson 3 Completed

I’m still having a lot of fun working through Carolyn Mitchell’s Mystique in the order she used when it was taught as a mystery project. Here’s how it stands now that lesson 3 is done.

This lesson consisted primarily of lots of smyrnas (in the four large outer blocks) and basketweave (in the outer rectangles and inside the smyrna circles). The only other areas included in this lesson were the borders of the East and West blocks, which were filled in.

This project really is fascinating. The finished piece, at first glance, appears to have identical North, South, East, and West blocks. In reality, though, they’re all unique. In this lesson, you can see the differences start to emerge. At this point, the sides opposite each other still match.

Stay tuned…

Monday, October 18, 2010

An Easy Way to Control Color With Multi-Color Threads

Overdyed. Variegated. Hand-dyed. Whatever you call them, these lovely threads sometimes intimidate stitchers, especially when they’re used in geometric designs when the balance of color may be important.

There are two schools of thought on using multi-color threads in designs such as these. I call them the “Don’t Cares” and the “Cares.” If you’re a “Don’t Care,” you’ll let the colors fall where they may. But if you do care, this can be a challenge.

I usually fall somewhere in the middle. On My Way, just a hint of overdyed thread was used. For this, I let the colors fall where they would, but I made sure just a hint of the yellow portion of my Watercolours thread showed up in each block. This color wasn’t used anywhere else in the piece, so it added a bit of interest, but it wasn’t glaring enough to completely distract the viewer.

On some projects, though, I work more in the “Cares” camp. I’ve found that when working a symmetric geometric design, controlling the color is easiest if you can find four lengths of the multi-color threads. Then you simply stitch each of the four sides starting with the same end of the thread.

As an example, I pulled a card of Rainbow Gallery’s Encore from my stash. To get a good run of color, I cut a fairly long length.


After separating the strands, I prepared each with a waste knot, trying to keep the tails roughly the same length on each strand.


Since my stitch of choice covered the back well, I decided to start the thread “in line” with my stitching, so I could just stitch over the tail, then cut off the knot when I reached it.

By repeating this on each side, trying to keep the waste knot the same distance from the start point, you can get consistent runs of color in your stitching.

You can see that I decided to try this on Mystique. Check out the overdyed silk (in this case, Caron Waterlilies) on this block.

This can be done with any multi-color thread, but sometimes you have to hunt to find four equivalent lengths of thread. I find that’s often too much work. Why bother, when some threads are perfect for doing this because they divide easily by four:

  • Bravo!, from Rainbow Gallery – 4 strands, pearl 5 weight
  • Encore!, from Rainbow Gallery – 4 strands, pearl 8 weight
  • Overture, from Rainbow Gallery – 4 strands, pearl 12 weight 
  • Waterlilies, from Caron – 12 strands, silk floss
  • Silk ’N Colors, from The Thread Gatherer – 12 strands, silk floss

Can you think of others? Please share!

Tuesday, October 12, 2010

Mystique: Lesson 2 complete

When Carolyn Mitchell originally taught Mystique to stitchers in her local area, it was a mystery project. As a result, the instructions are broken up into several lessons.

The first lesson consisted of all of the borders, and we completed this as prework for the class.

Since the class, I’ve completed lesson 2.

This lesson included the long rectangles around the center (with a few blank spaces for future beadwork), the gold X’s in the corners of the large North, South, East, and West boxes, outlining the border regions of those same boxes, and filling this region in North and South.

As you can see, because this was a mystery sampler, the lessons skip around the project quite a bit. A few of my classmates have been trying to finish the North block, and have found that they have to diligently read through lots of instructions to locate all of the details of this block.

I decided I didn’t want to work that hard on this piece and would rather be stitching instead of hunting for “What stitch goes here?”. My stitching time is too limited right now to spend it that way, so I’m going with Carolyn’s recommendation that we just work through the project in the order listed in the instructions.

I’m curious. How would you do it? Would it drive you nuts to leave a block almost complete like the North block on my piece?

Friday, September 24, 2010

Mystique class with Carolyn Mitchell

Yesterday and today I had the privilege of taking another class with Carolyn Mitchell. As in my previous class with her, I found her teaching style quite enjoyable.

She was thorough in explaining the placement of easier stitches, and in specifying which threads were needed for each stitch being reviewed in class. This wasn’t completely an easy feat, since there were two completely different color schemes available to participants. For more challenging stitches, she demonstrated each stitch several times in small groups.

After discussing or watching a demonstration of a given stitch, we had plenty of time to try it out and ask questions, which she patiently answered (some multiple times!). In fact, I think I finished more in the past two days than I’ve ever managed to do in a class.

Carolyn’s method of designing, she explained, is to stitch first, and then write instructions and chart the project. When she first started designing, she’d try drawing up the chart first, and then stitching, but she ended up making changes while stitching, which resulted in recharting the design.

Due to the lag between actually stitching an area and writing the instructions, we did have a few differences between the original and the eventual written master thread list and descriptions of which threads were to be used in a given area. Because of this and changes in dye lots, it was necessary to make a few changes to the instructions. Fortunately, these were fairly few and far between, and were all corrected at the beginning of class.

All in all, another wonderful class, and I look forward to making more progress on this project!

Wednesday, September 22, 2010

Looking ahead

Having finished My Way last week, I now have no fewer than THREE large canvas projects on my near-term radar.

The first, of course, is Mystique, the project from my Carolyn Mitchell class over the next two days. We did have to stitch the borders for the project as pre-work for the class, but fortunately the most time consuming part of this was the counting. The stitch is a simple slanted gobelin stitch over two canvas intersections.

Unlike My Way, Carolyn strongly suggested that all students use one of her two color combinations, so there’s no chance for my progress to stall simply due to decision paralysis. I’m looking forward to this!

Also on the horizon is Jim Wurth’s Prelude to Peace, an online class through Shining Needle Society. This class is scheduled to start October 1st. I’ve chosen my colors – just slightly brighter versions of the original blues and browns, but haven’t actually purchased any of my threads yet. I guess I’d better get going on this! (Note, the picture in the link above is another stitcher’s, not Jim’s original. I couldn’t find a picture online of the original colors, except in the SNS Home Room. If you’re really curious, you can always join – it’s free!)

Finally, my local EGA chapter is doing the correspondence course Cleopatra’s Cat by Mary Long. Since I’m not a cat person, I’m taking some liberties with this project. I’m making a greyhound outline from a picture of my Sophie, and will be stitching it in shades of brown and black to match her brindle coloring.

I’ll try to post a bit more frequently to share how I’m approaching this. Yes, it means a lot of decisions, but since it’s mostly thread decisions rather than color decisions, it shouldn’t be too difficult, yet will still present an interesting challenge.

In the meantime, I’ve actually picked up one of my slow WIPs. Over the past week, I’ve made a bit of progress on the border of Rae Iverson’s Blackwork Band Sampler.

If I don’t actually finish a few things, I’m never going to meet my goal of ending the year with fewer WIPs than last year. But then again, I’m sure that’s not the only yearly goal that won’t be met! :-)

Friday, September 17, 2010

Friday Finish: My Way

Yes, it’s finally done!

Design: My Way

Designer: Carolyn Mitchell

Technique: counted canvas

Ground fabric: 18ct mono canvas

Threads: LOTS!

Stitches used: LOTS!

Stitching timeframe: Started borders October 16, 2008; class November 8-9, 2008; finished September 14, 2010

For more detail around the threads and stitches used in this project, see my previous posts about it. And no, I have no idea what I'm going to do with it. It won't really "go" with anything in my house, but I had fun stitching it and though the decisions frustrated me from time to time, I think I learned a lot from this challenging piece!

I finished just in time. My next class with Carolyn Mitchell (her gorgeous Mystique) starts next Thursday!

Saturday, September 4, 2010

Another shop’s demise

Earlier this year, I received a letter from one of the two local needlework shops. The letter explained that the shop was closing, and detailed the merchandise sale prices during the summer.

It’s always depressing to hear of another shop closing, but this is the first in my area. While this is not my most-frequented shop, it carried a different selection of items than the larger shop in town.

Fortunately, the pair that run the shop, Frame Of Mind, do have another venture: Woolen Thread Designs. Their designs are lovely items, some of which are made entirely of wool felt, and some combine wool felt with cross stitch. They’re a lot of fun. I believe the owners will be continuing their work on the design company, but have decided to retire from the shop.

Next Saturday is closing day.

Today, MIL and I (with E in stroller!) went shopping.

I spent a little over $60, and came home with this:

One of the items that this shop carried that isn’t available anywhere else locally is Anchor floss and some pearl cotton. Since it won’t be available for me to look through there, I thought it best that I take some home with me. Besides, they’re trying to empty out the shop, so I couldn’t refuse to help them.

In case you were wondering, that pile is on the seat of my stitching chair, and consists of 375 different colors of floss (at 14.5 cents each), and 31 balls of pearl cotton, sizes 8 and 12 (at 4 for $1.00).

All and all, a great deal, right?

Then why do I think I’d prefer that the shop stay in business instead of practically giving their inventory away? :-(

Friday, September 3, 2010

Almost a Friday Finish: My Way

I’d like to apologize. I know my posts have been much too infrequent, and, worse, rather… um… boring and mechanical, if that’s the right way to say it. I hope you know what I mean.

There’s a simple reason behind this. My stitching has slowed down to a point where I’ve felt like I have to show some significant progress on a project before I can post about it. As a result, I’ve gone overboard. I get to the point where something is done, or nearly done, before I post about it.

The result, if I post too often, is that there’s nothing to show, and if I post too infrequently, you miss the process of my stitching. I’ve got to try to find a happy medium.

Anyway, I was going to post one block of My Way every few days just to put something up here, and I realized I was sorta dreading writing those posts. They’re as boring for me to write as they are for you to read!

The truth? All of the blocks are done. I’ve just got to make a few decisions on the border. What do you think?

You can see the slight beginning of some of the border decisions. The thin outside border is meant to be in a thread like pearl cotton #5. Unfortunately, all of the values of my border (gray-green) color family don’t come in DMC pearl 5. Specifically, the medium dark value of this family is only available in floss.

For a while now I’ve been meaning to try Linda Reinmiller’s method of making pearl cotton out of floss, so I gave it a shot. I guess I have to play with this a bit more, though, because I really didn’t like the look of the thread that resulted. It’s likely just operator error and lack of practice.

I did try stitching with my homemade pearl, but it didn’t stay in the project long enough for me to take a picture. I’ve decided to just lay three strands of floss for the thin outside border. Despite the need to pick up the laying tool, this will undoubtedly take less time than trying to perfect my pearl-making skills. And my stitching time is limited enough right now.

I’ve also put crescents around one of the corner blocks with two strands of the same color floss. So far, I really like this combination. Now I’ve just got to figure out what goes in the middle of each of those corner blocks!

I’d be interested to hear if you’ve tried making pearl cotton from floss and how your experience went. Some people swear by it, but I’ll reserve judgment until I try it again.

Tuesday, August 31, 2010

My Way progress: Block B completed

Yes, My Way is coming along. Here’s my completed block B. Unlike block A, I didn’t make very many changes to this one.

This block was a lot of fun. It used, among other stitches, the sprat’s head stitch, and two stitches designed by Jean Hilton: crescents and double fans. (And since I can’t find any instructions for a double fan online, that will undoubtedly be a future blog post!)

I used a variety of threads in the block. If you look closely, you may be able to spot:

  • Kreinik 1/16” ribbon
  • Caron Impressions and Watercolours
  • DMC floss, #8 and #5 pearl cotton
  • Rainbow Gallery’s Nordic Gold and Neon Rays
  • Gumnuts Blossoms
  • Trebizond from Access Commodities

Despite the variety of textures and stitches, this block isn’t too busy. I like how it turned out.

Friday, August 20, 2010

Friday Finish: Omega

Thanks for all of the great comments on my colors for Omega. Over two cards of Neon Rays and a whole bunch of crescents (and one Rhodes stitch) later, it’s done!

Design: Omega

Designer: Jean Hilton, for Rainbow Gallery

Technique: counted canvas

Ground fabric: 18ct mono canvas

Threads: Trio (a silk and wool mix) from brown paper packages, FyreWerks and Neon Rays from Rainbow Gallery, and just a touch of Kreinik braid

Stitches used: cross stitch, long stitches, plaited rays, backstitch, Rhodes stitch, and crescents

Stitching timeframe: August 2-8, 2010

********************

Thanks for all of the best wishes for E. We had a bit of a setback requiring recasting this week, but she seems to have adjusted quickly to the new cast.

Sunday, August 15, 2010

An Unexpected New Start

Sometimes, life just gets in the way of stitching plans. In my case, I had thought I’d be continuing My Way and have it nearly done by now.

But it was not to be. Somehow I had neglected that this piece is just a bit too big to be carting to hospital waiting rooms.

Yes, E and I spent another night in the hospital two weeks ago after she underwent another surgery (as always, hopefully this is the last!) to fix her hips. (And yes, she’s back in a cast, but only for 6-8 weeks this time. Unfortunately, she’s much more aware of it at 18 months than she was at 5 months.)

So, being as I was still in the canvas mood, and since I didn’t have anything in progress small enough for stitching in the waiting room, I started something new. What else was I supposed to do? :-)

I was reading back over some old posts and reminded myself that one of my goals for the year was to start something by Jean Hilton. It just so happened that I had Jean’s Omega kitted up, so to the hospital it went.

By the end of the first day (after 4 hours of surgery + after she fell asleep at night), here’s how it ended up. My apologies for the blurriness!

Of course I changed the colors from Jean’s original. Why shouldn’t I? I also made the choice to stitch the center star in two colors rather than just one as in the original.

E came home the day after surgery, and no more progress was made that day. The rest of the week, however, was a different matter. Since she was sleeping a lot due to the pain meds, I managed quite a bit of stitching time.

A few days later, the rest of the borders were in:


Rainbow Gallery released this design in 1990, and a few of the threads have changed over the last 20 years. I decided to use two colors of RG’s FyreWerks for the center star and two of the borders and 1 strand of Trio (from brown paper packages) for the inner and outer borders.

Within the week, I did finish the piece, but you’ll just have to wait until Friday for the big reveal! :-)

Oh, and E is doing as well as might be expected, for a kid who was just starting to walk on her own and is now immobile. She’s figuring out how to drag herself around a bit, but isn’t too happy about it!

Friday, July 30, 2010

Friday Finish: Jacqui's Choice

Since I'm back on a canvaswork kick, here's one of my early canvas projects.

Design: Jacqui's Choice

Designer: Nanette Costa

Technique: counted canvas

Ground fabric: 18ct mono canvas

Threads: cotton floss, metallic threads, seed and pearl beads

Stitches used: couching, beading, lots of Hilton stitches (jessicas, crescents, Amadeus)

Stitching timeframe: 2002-2003

This project was from my very first multiple-day class, taken with my local EGA chapter. Up until this, I had only taken classes through my local shop or 1 day classes at a stitching festival. Needless to say, I really enjoyed it.

I actually had it framed on point. Looking at it now, I like the diamond shape, but I’m not crazy about the rest of the framing choices, though I’m not sure what I would change if I were to have it reframed.

I’ve wondered whatever happened to Nanette Costa. She was a fabulous teacher. I’m saddened to find her listed on the “inactive or retired” list on the National Academy of Needlearts (NAN) website. Does anybody know what she’s up to now that she’s not teaching?

There are still a few of her commercial patterns in various online shops if you look hard enough.

Wednesday, July 28, 2010

Rediscovering my stitching (and blogging?) mojo

Do you ever hit a point where just about anything can distract you from stitching? I’ve been there for most of the past month.

Don’t get me wrong – I love stitching. It’s just that none of my projects has really been calling to me lately, and other silly things have distracted me in my leisure time. Yes, silly – like playing games or finding cool apps on my new iPod Touch, or surfing the web (sometimes on non-stitching sites, no less!).

It’s really pathetic that my stitching mojo just about completely stalled, considering that I’m almost done with the hardanger piece. Oh, well. It will be quick to finish when I get back to it.

I did start the sampler project that’s part of the Thistle Threads Gold Master Class, then found that since I joined the class on the last day of signups, several of my threads are backordered. On the first motif I stitched, I discovered that I’m missing two or three (out of six) colors. Not very inspiring.

Mojo returns!

All of a sudden, though, I’ve started stitching again! What changed?

It’s simple. I started my Friday Finish posts in part to inspire others, and ended up inspiring myself! My last posted finish, Silk Pageantry, reminded me how much I really enjoy canvaswork and hadn’t been doing much lately.

That’s how My Way found its way back onto my lap stand.

Finalizing decisions so I can just stitch

It’s been a while since I posted about this piece, so let me refresh your memory. I started this project in November 2008 in a class with Carolyn Mitchell.

My Way is a project similar to my more recent class, Potpourri with Margaret Bendig, in that each student chooses her own colors and threads and has a great deal of liberty about exactly how they’re placed.

Here’s what My Way looked like when I last posted about it in November. I’ve stitched on it a bit since then, so it was a bit further along when I picked it up last week.

I don’t know about you, but sometimes I want to just stitch. I don’t want to have to make decisions on every project I pick up. I think this was one of the reasons my stitching stalled. I was making decisions on Potpourri, and then on the hardanger piece.

When it came to the six blocks in My Way, I’d made all of the decisions on five. I only had to finalize the center area on Block A, and then I could just stitch.

Block A is the lower middle square in the photo above. I kept pondering this block for a while, because it seemed out of place. The rest of the block centers aren’t square. They extend a bit into the “arms” of their crosses. Can you see what I mean?

I wondered what would happen if I extended the waffle stitch in the middle of this block until it hit the corner areas of the block. So pulled the center out and tried it. Aha! That’s better.

Then I wanted something different than originally designed for the “arms” of this square. So I tried a few things:

Section A is just some large eyelets in two colors. It didn’t get finished because I realized it looked too similar to the main borders of the project.

Sections B and C are actually the same stitch (alternating oblong and square crosses), in the same colors, but with the color gradations opposite each other. I took a vote with some stitching friends. Two liked B, and two liked C. Not much help there. I looked at it from across the room and decided I liked the dark in the middle.

Hooray! Now I can stitch away, with no decisions in sight until I finish all of the blocks and need to finalize a couple of things on the border.

Aaaaaahhhhh!

Oh. In case you’re curious, yes, I have finished this block. What do you think?

Sorry for the really long post. I guess I’ve been storing up blogging mojo, too. Now that I’m stitching again, there’s a chance that I’ll be posting more!

Friday, July 16, 2010

Friday Finish: Silk Pageantry

This week's pick is just because I haven't featured much canvaswork lately here on Just String.

Design: Silk Pageantry, a now-retired ANG group correspondence course

Designer: Kay Cline

Technique: silk and metal on canvas

Ground fabric: 18ct mono canvas

Threads: silk floss, metallic threads, silver pearl purl

Stitches used: crossed and flat canvaswork stitches, couching

Stitching timeframe: middle to late 2006

I changed all but the background colors from Kay Cline's original design, including switching from gold pearl purl to silver. I was surprised to notice that the silver is starting to tarnish a bit already. Does anybody have any hints for slowing this tarnishing?

You may not be able to tell from the picture, but the pearl purl (see the arrows in the picture) is actually slightly stretched from its original form, resulting in a wavy silver wire that is couched. I really like this technique.

In case you're curious about how I framed this:

Sunday, July 11, 2010

Planning a path in hardanger

When stitching filling stitches in hardanger embroidery, it’s very helpful to think through the order of stitching, or the path you’re going to take.

I’ll walk through how I stitched the second end of my pastel hardanger piece (after I learned a few things with the first!).

The first step is to cut out the appropriate threads. But wait. In case you’re unfamiliar with hardanger, take a look at the little blocks of 5 stitches. These are called kloster blocks. They act as a fabric hem so the threads next to the blocks can be cut.

The result is a mesh where, both horizontally and vertically, you’ve got four threads intact, then a space where four threads were removed.

Knowing that I’ve got to work the divided branches on to center wrapped bars (which you’ll see below), I decided to do those wrapped bars first.

Looking back at my chart for this area (option 3 in the link), you’ll see that it calls for two wrapped bars side by side down the center. In the photo above, I’ve worked from the right side to the left, wrapping one side of these side-by-side wrapped bars, and I’ve started stitching back to the right, working the second of each pair. (Does this make sense?)

After finishing the side-by-side wrapped bars, I’m back on the right (seen above), and need to start needleweaving the outside sets of threads. As I work to the left, I’m putting in the divided branches where they’re needed. In the photo below, you can see how these wrap over the wrapped bars and distort them.

In the very center, I did a different type of divided branch, where two points are anchored in fabric, and the other is over a wrapped bar. I’m sure somebody else has done this, but I don’t recall seeing it in any books.

Reaching the left side again, I’m traveling to the other bars that need weaving by slipping under the kloster blocks on the reverse side of the piece. Then I’m working back to the right.

Upon reaching the center of this path, there’s a bit of a snag. I need to stitch side-by-side wrapped bars again. Unfortunately, there’s no help for it.

I decide to stitch the lower one first, putting in the dove’s eye, then I need to somehow stitch the other wrapped bar. I did this slightly differently on each end. If I did it again, I’d repeat this method: I kept stitching the rest of the path, then went back to wrap that last bar at the end, burying the thread in the neighboring needleweaving. Anybody have a better idea?

Only a little bit left to do before the stitching is complete on this!