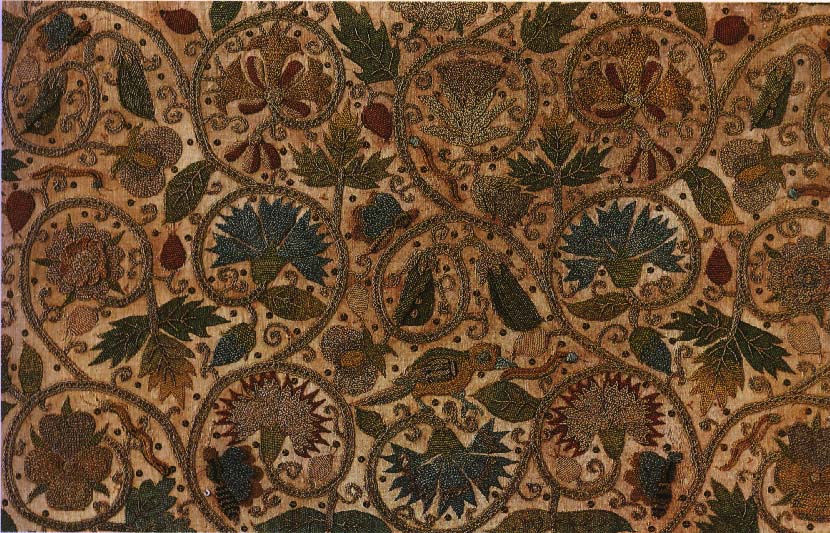
While I haven't been blogging much lately, I have been stitching, and, unfortunately for my pile of WIPs, planning to start new things.
 First, an update on the Tudor Purse: I was making good progress on this, when it became apparent that the "scooping" motion of the Ceylon stitch was starting to aggravate the carpal tunnel in my right wrist. So, while this piece isn't very big, I've put it down for a bit. I'll have to work on it only a bit at a time.
 When I put the purse down, I decided I hadn't done much sampler/linen work lately, and that was calling to me. Of course, instead of picking up Catherine Theron's Examplar IV, which is much further along, I dug out Martha Wilkins from The Scarlet Letter. I last worked on this piece back in December, and it was still in the same state as in the photo in this post. As you can see, this week I finished another band of lettering and almost the entire next band. At this rate, I might be done in the next 10 years! :-P
On Wednesday, I attended our local ANG meeting. I didn't really feel like working on notebook stitch samples with the rest of the group, so I started the outreach project that was announced last month. We're stitching heart-shaped ornaments with a centerpiece of a cancer ribbon. I can't remember the details, but we're donating these for some cause or another. (And I know MIL is cringing as she reads this since she's the outreach chair!) Anyway, I'm doing a purple ribbon for pancreatic cancer, in memory of my two grandparents whom I lost to this fast-acting disease.
 I wanted the center ribbon to stand out, so I did it in detached buttonhole with a heavy thread, in this case Shepherd's Wool from the Thread Gatherer. Apparently this thread is no longer being made, since it's not listed on TG's website. I received this skein in a grab bag a few months ago, and thought it was perfect for this! The background is a couched stitch, specifically Aristeia couching (diagrammed in SuZy's Lite Stitches, one of the books I picked up at seminar), with a Brazilian embroidery rayon thread as the couched thread, and 4 strands of floss as the couching thread. I thought this would work up faster than trying to fill the entire background with stitching, and so far it has. I've only worked on this at the meeting Wednesday night and at our Thursday night LNS stitch-in. I hope to finish it this weekend.
I have a few upcoming projects, too. Tomorrow, I'm attending a class for a Bargello needlecase. Since our EGA chapter is hosting the region meeting today (though I'm not going), we decided to take advantage of the opportunity to have one of the visiting ladies stay for an extra night and teach this lovely project. One of the chapter members had taken the class from her in the past, and it's lovely. Today I need to rummage in my stash to find fabric and threads for it.
Carolyn Mitchell is visiting our LNS for a 2-1/2 day class in the middle of November, and I've signed up for this class, too. She's teaching a canvas piece called My Way, which looks like a six-patch quilt design. We need to have the borders laid out as prework, and from what I've heard, this is fairly time intensive. I've got my color scheme picked out (see the collection of threads I brought home from seminar), but I'm waiting for a pair of Evertite stretcher bars to show up in the mail. They were shipped over a week ago, but the USPS website only shows them as being received into the mail stream. Goodness knows where they might be now!
Lastly (I think), I need to get started on Luan Callery's Summer Dream, an EGA GCC that some in my chapter are doing in conjunction with the Buffalo chapter. It's due in January. I've been following Pat's progress on this same piece, and I'm looking forward to it!
 In other news, I believe I did mention that I had received my pieces (and ribbons!) back from the ANG seminar exhibit. Also in the package was a little card telling me to call the Boehm porcelain factory, because they had the rose that was part of the Princess Grace award. I made that call, and this week the package arrived. The box was huge - and full of foam peanuts! Inside the box was another box, with more peanuts. I finally found the porcelain rose taped to the bottom of the inside box, and I understood the need for the extensive packing. The petals are amazingly delicate. Here's a picture of my stitched Lilacs, its ribbons, and the rose.
And last, but the most important news of all (now that I've finally told everyone locally who might be reading this blog). I've got another work in progress: 19 weeks along, 21 to go. Yes, I'm expecting(!), due the first week of March. This is our first, and DH and I are very excited. No, we don't know if "The Kid" (shortened to "TK") is a boy or a girl, and we're planning to be surprised! This news is the main reason I'm taking classes now, because I know I won't be able to for a while. :-) I'm sure finding the time to finish any of these pieces is sure to become difficult though! :-P


 Two finishes within a week! Never mind that I actually finished a seminar piece within 6 months of the class.
 The assembly of the Tudor Purse was a bit more complicated than that of the Blueberry Pocket. There is a layer of thin quilt batting between the outside and the liner. Both the outside layer (inside out) and the liner (with batting attached) were sewn up the sides. The outer layer was turned inside out, then the liner was inserted. The top seam allowances for both layers were folded in and stitched together. Handmade braid was used to trim all of the seams, with handmade tassels attached at appropriate points along the bottom. More braid was used for the strap. Yes - that braid took a long time. It's made of 5 strands of purple and gold thread.