/** Google Analytics script below */ /** end Google Analytics script */

Tuesday, July 31, 2007

July recap & August goals

Another month gone, and August is almost upon us. Here were my goals for July, along with what I actually accomplished:

  • Finish the kimono - I barely touched this piece!
  • Start Fantasy Remembered GCC, and get through "session 3" - DONE! I then started session 4 by putting in the spider web.
  • Send in the Goldwork Heart GCCs (I & II) for evaluation - Wow, am I a slacker, or what? I picked up a priority mail box at the post office, but didn't send these in yet!
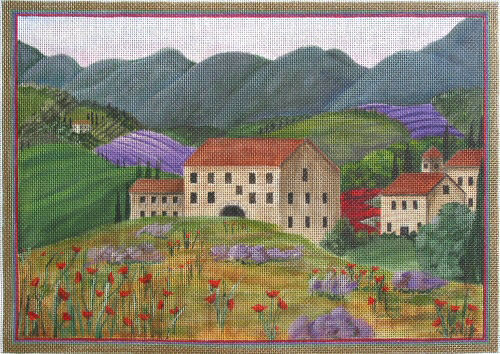
  • Enjoy the class with Sharon G while starting the Tuscan Spring canvas - DONE! This was a wonderful class!
  • Start and finish window 4 on the GAR mystery sampler - Well, I started the floorboards, but I think I want to remodel (i.e. redesign) the kitchen a bit before I stitch it.
I also started Hillside Samplings Be You to Others Sampler (a.k.a. the Ninja Squirrel sampler) and the next goldwork GCC, Luck of the Irish. And I started my WIP-loss challenge!

******************************************
For August, my goals are:
  • Finish Luck of the Irish GCC (which is due at the end of the month, not in September as I stated last week!
  • Continue working on the Fantasy Remembered GCC.
  • Send in the Goldwork Heart GCCs (I & II) for evaluation
  • Send in the Tiramisu GCC for evaluation (which I finished back in March!)
  • Start and finish window 5 on the GAR mystery sampler
  • Work on "redecorating" window 4 (the kitchen) on the GAR mystery sampler
  • Start and finish the next in the Jim Wurth series (remember - this is one of my exceptions in the challenge)
  • Work on some of the other pieces in my challenge list.
This is going to be a very hectic month for me at work, so we'll see if I can stick to these goals (not that I have in previous months!)

Monday, July 30, 2007

Blog Poll 1: Preferred Posts

Taking advantage of a new feature from Blogger, I've added a poll to the right-hand column. Please tell me what types of posts you like best! You can pick more than one answer. I'd hate to think I'm writing posts that people think are a waste of time.

If you want to go into more detail, please feel free to leave a comment!

Saturday, July 28, 2007

Tricks to making blueberries!

It was a slow week on Fantasy Remembered - until I discovered a trick or two for making the blueberries! Each blueberry is made with a large plastic bead, covered in floss. Sounds easy, right? Simply take a length of floss, strip* all 6 strands and recombine, thread the needle, go through the hole of the bead, around, through the hole again, etc., until the entire bead is covered.

But, oh by the way, try not to let the threads twist as you do this!

As I made the first couple of blueberries, I struggled a bit, until I figured out two invaluable tips:

#1. File the bead first!

Ok, that sounds dumb, but these beads are made in a mold, which can leave a ridge down the middle of the bead. The very first blueberry I made looked like it had a seam right around the fattest part of the berry (and unfortunately, I didn't take a picture). I knew I'd always hate it if I actually put this berry on my piece. When I moved on to the next berry, I tried to take a smoother bead, but this one also had some rough areas. My solution was to pick up a nail file and gently buff away the rough spots. (The emphasis is on "gently" because you don't want to make a flat spot on the bead - the berries are supposed to be round!) I eventually discarded the first berry made.

#2. Find a third hand!

Hanging on to the tail of the thread with two fingers while slowly wrapping the floss around the bead and keeping the threads from twisting eventually gave me a cramp in my hand! I needed to figure out how to hold the tail another way.

Aha! The wedding ring! Using a tapestry needle so I wouldn't puncture myself (!), I ran the thread under my ring toward my palm, then wrapped it around my little finger.

Then I passed the thread back under the rings, this time away from my palm, trapping the tail of the thread under it. I wrapped it once more around the rings to make sure it was secure.


This technique worked wonderfully, and I was able to finish making all the blueberries, without having to deal with hand cramps.


The finished cluster of blueberries:

Now I've just got to put leaves on the raspberries, and I'll be through "session 3" of the instructions for this piece!

* If anybody wants a tutorial on stripping floss (since I couldn't find one on the web with pictures), please let me know by leaving a comment!

Monday, July 23, 2007

Leaves & Raspberries

Quite a bit of progress has been made on my Fantasy Remembered lately! All of the wired leaves are done, but these won't be added to the main piece until everything else is finished.

The past few nights, I've been working more french knots on raspberries. Most of the berries are stitched on a separate piece of fabric and then individually attached to the main piece so they have dimension.


Here's the entire piece so far:

Saturday, July 21, 2007

The To-Be-Finished List

Here's the preliminary list of pieces I want to finish in my challenge. Clicking on the name will show what the finished piece is supposed to look like (or the painted canvas for the kimono), and I'll try to add pictures of the current state of each in the next day or two.

  1. Fantasy Remembered - stumpwork EGA GCC by Luan Callery (due in September)
  2. Luck of the Irish - goldwork EGA GCC by Michele Roberts (due in September)
  3. Tassels Kimono - hand-painted canvas from Sophia Designs
  4. Blackberries - silk gauze design by Gitta's Charted Petit Point
  5. Be You to Others Sampler (a.k.a. The Ninja Squirrel Sampler) - cross stitch design by Hillside Samplings
  6. Scottlee - counted canvas design by Jean Hilton
  7. Winds of Color - line drawn canvas design by Elsa Parrish
  8. Examplar IV - historical-style sampler by Catherine Theron
  9. Redwork Mystery Sampler by Gay Ann Rogers (if I get all the parts before finishing this challenge)
  10. Rose's Pyramid - stumpwork pyramid box by Marsha Papay Gomola
(Unfortunately, I couldn't find a picture of Scottlee or Winds of Color on the web!)

I have a lot of work in front of me - but I've deliberately chosen a wide range of techniques, so I won't get bored with any one piece!

Now, I may stitch a bit before going back to Harry Potter...

(Edited to correct the date on this post - I started it on Thursday, but didn't actually post until Saturday. Blogger is weird that way!)

Thursday, July 19, 2007

The WIP-loss Challenge!

In the spirit of the 50 (or 25, or 10) project challenge from HasturTorres, I'm challenging myself to "lose" some WIPs. Now, this does not mean I'll hide them somewhere and not be able to find them. Just like losing weight the old-fashioned way, this takes willpower, dedication, and a good buddy system! I'm hoping this blog will work as the buddy system. Hopefully the readers of this blog will keep me honest in pursuing my goal!

If you're a person who only stitches (or knits, or crochets, or quilts, etc.) one item at a time or keeps her (or his) pile of WIPs (Works In Progress) down to a manageable few, congratulations! This challenge is NOT for you! I aspire to be more like you!

If, however, you feel weighted down by your ever-increasing pile of WIPs, as I do, this challenge is for YOU! Please feel free to adapt my challenge to your goals.

So, what's the challenge? Simple: Finish 10, start 1! At least, that's my current challenge. I probably have a backlog of 30 (or more) started projects (WIPs & UFOs). Most of these are LARGE projects. After I finish these, I may start the challenge again with the goal of finishing 5 before starting another.

Here are the "rules" I'm setting for myself:

  1. Have fun!
  2. The "to be finished" list can be changed over the course of the challenge, depending on which projects are calling to me over time.
  3. The term finished means the completion of stitching. It does not mean the completed item must be framed or otherwise made into a useful item. (If that was the case, I would have close to 100 WIPs, based on the number of items sitting unframed in my closet and cedar chest.) If your textile medium of choice is not stitching, you'll have to decide what finished means to you.
  4. While selling, giving away, or trashing unwanted UFOs may reduce the total pile, they don't count toward the total finished. (In the parallel to weight loss, this is like liposuction - effective, but less satisfying!)
  5. Exceptions are allowed, if declared up-front. My exception is keeping up with the Jim Wurth series. These pieces don't count for starting or finishing.
  6. Gift stitching for a special occasion doesn't count. I can foresee one of these - making a Christmas ornament for my cousin's new baby. (I did stitch one for his first child, after all. This is only fair!)
That's all I can think of for now. If you can make any other suggestions or want to join me in buddy system support, please leave a comment! I'll come up with my initial "to be finished" list in the next week or two.

Tuesday, July 17, 2007

Yet another start, and a challenge!

Last month, I finished the Goldwork Heart II during our goldwork group meeting. Our group meets again tomorrow, and I have yet another goldwork GCC due in a few months, so I'm going to start it! Luck of the Irish is another Michele Roberts design, offered as a group correspondence course through EGA. Tonight I'll be mounting this on the working frame.

When I decided to do this, I came to the realization that this is the eighth project I've started since early May, and I've only finished one of these (Jim Wurth's Arcadia) and one other project (Goldwork Heart II). The others are:

And that's not counting all the other WIPs/UFOs in the works!

I need to finish a few things! Stay tuned for the challenge I'm posing for myself to answer this need. It's not the same as "The Wagon" challenge, but it's similar!

Monday, July 16, 2007

Sharon G. class, Day Two

As I mentioned, in the second day of class, we all started stitching on our canvases. (If you're just tuning in, I'm doing Sharon's Tuscan Spring.)


I spent most of my time working the first lavender bush (yes, those are lavender bushes in the foreground!) with knots. Sharon calls them "sloppy french knots", but I prefer Carole Lake's description of "sloppy wrapped knots", since a true french knot only has 1 or two wraps, depending on whose definition you use! These sloppy knots have anywhere from 2 to 8 wraps. Most of mine had 3-5 wraps on them. I used a variety of solid and overdyed lavender threads, blending various combinations of two strands in the needle.

When I got tired of making knots, I moved on to the foreground hillside. I used a stitch that's a combination of burden stitch and double brick stitch. Essentially, a double brick stitch (over two threads) is used to couch a length of thread along the row. I used one strand of overdyed floss in green and brown. After I got a few rows in, I decided this thread has too much green in it, so it looks like I'm overlaying a green screen on top of the painted canvas. I'm going to rip this part out and replace it with another color. Sharon suggested Gloriana's Pecan.

It was getting late when I discovered I was wasting my time on the hillside, so I just started the cream-colored tent stitches around the windows of the house.

Sharon also reviewed the Mindy canvas with me. It made me feel a little less clueless when she really had to think about the canvas before sitting down with me! She provided a number of great ideas, and I wrote them all down for the eventual stitching of this canvas.

Saturday, July 14, 2007

Sharon G class!

Wow! Day 1 of the Sharon G. class in canvas embellishment is over. I learned soooo much, and am completely wiped out! As one of my comrades said at lunchtime, "I can't listen fast enough!" And the weird part is, not one of us put a single stitch into our canvases - we just talked through all of them.

Tomorrow, we'll start to stitch, and ask questions as we go along. I'm planning to bring the Mindy canvas I spoke of a few weeks ago, because I'm still fairly clueless on what to do with it.

Sharon, if you're reading this, thanks for a completely wonderful, exhausting day! It was fun to try to keep up with you!

Friday, July 13, 2007

SBQ: Love and Hate

It's been almost a week since I posted, and that's partially because I haven't been stitching much this week. We've had landscape contractors here, ripping out shrubs & weeds, and fixing the flower beds so I can repopulate them with nicer things! Anyway, on to stitching!

I'm so far behind on SBQ's (Stitching Bloggers' Questions), I won't even try to catch up! This week's question applies to one of my current projects, though, so it's getting me back into answering SBQ's!

This week's SBQ was suggested by The Wagon:

What do you love to do that many people hate? What do you hate to do, but do anyway?

All right, I'm strange, but I find french knots very easy, and really like doing them. It seems that so many people avoid french knots or replace them with beads or other types of knots!

For the record, I make french knots with one wrap around the needle (although most diagrams show two), and sink the needle just a little bit away from where the thread came up through the fabric. Maybe some people don't like them because they try to go back down in the same hole and the knot slips to the back of the fabric. That would frustrate me, too! Try moving over a bit (or over 1 thread of linen/canvas) when bringing the needle to the back, and it becomes very easy!

Here are my most recent additions to Fantasy Remembered - french knot raspberries:

I've even picked up one of Theresa Layman's kits (Snow White, Rose Red) that is nothing but french knots!


As for what I hate to do - that's easy! BACKSTITCHING! I'll do it if it's just a bit here and there, but nothing will make me put a cross stitch chart down faster than tons of backstitch to define the shapes in the picture. It's as if the designer has never heard of shading. And if the backstitching is used as a separate element, like a tendril on a vine, I'll stitch that in double-running so the thread on the back doesn't show through to the front.

Saturday, July 7, 2007

Wired Leaves

Wired leaves and petals are one of the basics of modern stumpwork. The use of wire to edge stitched areas that will later be attached to the final piece allows for bendable, three-dimensional realism. To see what I mean, check out this piece from Jane Nicholas!

It would be a bit much for me to call this post an official "How To" tutorial, since I've never actually finished a piece with wired leaves. I have however, started three - all from classes or GCCs:

Here's a picture of some of the wired leaves in process for Fantasy Remembered. The process for making wired leaves is really pretty simple, but it takes a bit of time. It starts with a ground fabric like batiste or muslin. This can be white, or if you don't want to worry too much about the ground showing through, a colored ground can be used, like the green for these leaves. The pattern for the shape needed is traced onto the fabric. The fabric is mounted in a small hoop. Then, a thin wire (like 28 gauge floral wire), either covered or uncovered (two classes specified uncovered, one used fabric-covered wire), is couched over the outline. The couching stitches can be seen on two of the leaf forms in the picture.

After the shape is in place, the entire edge is worked in buttonhole stitch (or blanket stitch, to be precise). This takes a lot of time, especially if a single strand of floss is used, because the stitches have to be so close together that the wire does not show through. This is where using green fabric covered wire is an advantage for leaves! I usually stagger the base of the buttonhole stitches, as can be seen in the picture, so that the ground fabric does not become weakened by many closely-spaced stitches piercing the fabric in a row.

The leaf filling can be done in a variety of stitches. For Fantasy Remembered, outline stitch is used (right). Kathy Fenchel used satin stitch for the sunflower leaves, and long-and-short is used for the petals on Rose's Pyramid (below).

After the stitching is done on all the leaves in the hoop, very small sharp scissors are used to CAREFULLY cut the fabric around the leaves, leaving the wire ends attached to the leaves. I haven't made it to that point yet on any of mine, but hopefully I'll finish these first three leaves within the next week, and I'll write up any difficulties I find!

These detached elements are attached to the main piece of fabric as the last stage of the stumpwork piece. The wire ends are pushed through the fabric and whip-stitched to the back to hold the leaves in place.

If anybody can add details I might have missed (since I haven't actually finished one of these pieces yet!) or has questions, please feel free to comment!

Friday, July 6, 2007

Startitis!

On Sunday, I finished all but the gold couching on the Kimono. I finally decided to use encroaching gobelin (1x2) for the blue flowers, then it was on to the gold! Upon reading a bit about couching in traditional Japanese embroidery, I realized I had to get a pair of koma. These are used to help control and direct the threads being couched, which are fairly lightweight and don't want to stay in one place without help! So, what's a girl to do when she can't progress with the current project when the LNS is closed? Start something new, of course! :-)


I've had Fantasy Remembered, an EGA group correspondence course by Luan Callery, waiting in the wings for a while. I traced the design on the fabric months ago! I've been hesitant to start it because it's stumpwork, and while I want to get better at non-counted work, I'm an engineer, so the exactness of counted work appeals to me! Anyway, I found I had the correct size stretcher bars, and got to work mounting and lacing the fabric as specified in the course directions.

The instructions are broken down by "sessions" for those groups that will be meeting monthly. Since I'm taking this through the CyberStitchers chapter of EGA, we don't have sessions, and we're on our own except for the Yahoo! group set up for the class. The first session consisted of working the stems in outline stitch and the tendrils in coral knot stitch, using Medici wool. I must be getting more comfortable with non-counted work (thanks to the goldwork hearts, perhaps?), because I actually enjoyed working this, and wasn't completely stressed out about it being perfect! I only occasionally had to repeat my motto: "It's just string... it's just string".

I finished session 1 in only a few days (I'm on vacation!), and have since moved on to session two - the flat and wired leaves. I've started the leaves on the ground fabric in outline stitch with 1 strand of floss. This is a bit more frustrating because the floss does not plump up as much as the wool, and is somewhat less forgiving, but I'm making progress!

Moving on... In the past week, I've made a few purchases. Last Thursday at the LNS, I came across Hillside Samplings' Be You to Others Sampler, and had to pick it up! Also, MIL and I went to a not-so-LNS on Tuesday! I purchased a new tote bag, some more Japanese gold for the kimono, and four sampler charts.

Yesterday, knowing that it was stitch night at the LNS, I thought about what I would take to stitch. I realized that both the kimono and the stumpwork would take a bit more concentration than a group stitch-in would allow. So, ignoring the many other already-started projects, I decided that I needed something fairly simple. (Note - I did not say small. I don't do too many small pieces!) So, I looked at my new sampler charts, picked one that was mostly cross stitch and would fit on one of the fat quarters I had, and could be started with threads from the stash! (You can see why this post is labeled Startitis!)

I chose the Be You to Others Sampler. This is probably the last time I'll call it that. When the ladies and I were looking at the chart last week, we noted the disproportionate size of the various elements in the picture. This was common to samplers in the nineteenth century, and while this isn't a reproduction, it has a historical feel. In particular, we noted that the squirrels under the tree on the left were nearly as big as Adam and Eve under the tree on the right, and were pretty tall in relation to the house. They almost immediately were dubbed "Teenage Mutant Ninja Squirrels", so this piece is now destined to be known as the Ninja Squirrel sampler amongst my stitching friends!

And so, the Ninja Squirrel sampler was started last evening. I'm using a 36ct linen from Lakeside in a limited run color. I received it as part of the fabric of the month club from Silkweaver a few years ago. The color is a light warm brown, though it's hard to see in the picture due to the camera flash. I'm using a single strand of silk over two, and found sufficient colors of Vikki Clayton's Hand-Dyed Fibers in my stash to at least start the border to make sure the fat quarter was going to be wide enough. The fabric is 18" wide, and the sampler is almost 14" on the 36ct. I started in the middle of the border, and ran it past the LNS owner/framer to make sure it was frameable. I didn't want to stitch more than needed and then find out I was wasting my time!

My apologies for the (really) long post, but I've been stitching a lot this week!

Wednesday, July 4, 2007

Happy Birthday, USA!

To all my fellow Americans, Happy Fourth of July! (To those of you in other areas of the world, you can have a happy fourth as well, but it just doesn't mean the same thing! :-) )

To celebrate, here are some sites with patriotic freebies:

If you've found some other freebies and would like to share where they can be found, please leave a comment!

Enjoy the designs, and have fun grilling, watching fireworks and parades, or just stitching - however you want to celebrate the day!

Monday, July 2, 2007

June recap & July goals

Wow, June flew by and it's July already! Here were my goals for June, along with what I actually accomplished:

  • Complete Jim Wurth's Arcadia - DONE!
  • Start and finish GAR mystery window 3 - DONE!
  • Get the tree done on Picnic Hampered! - Not even close, due to a change in priorities (see this post)
  • Work on Examplar IV - Unfortunately, not one stitch!
  • Work on Goldwork Heart II - Not only worked on, but finished!
I also picked up my needlepoint kimono, and finished all but the blue flowers (although those were finished yesterday!) and the gold couching.

******************************************
For July, my goals are:
  • Finish the kimono
  • Start Fantasy Remembered GCC, and get through "session 3" (note - I actually started this yesterday!)
  • Send in the Goldwork Heart GCCs (I & II) for evaluation
  • Enjoy the class with Sharon G while starting the Tuscan Spring canvas
  • Start and finish window 4 on the GAR mystery sampler
I'm looking forward to a productive month!